If you love homemade bread as much as we do, next time check out these other Restless Chipotle no knead bread recipes!
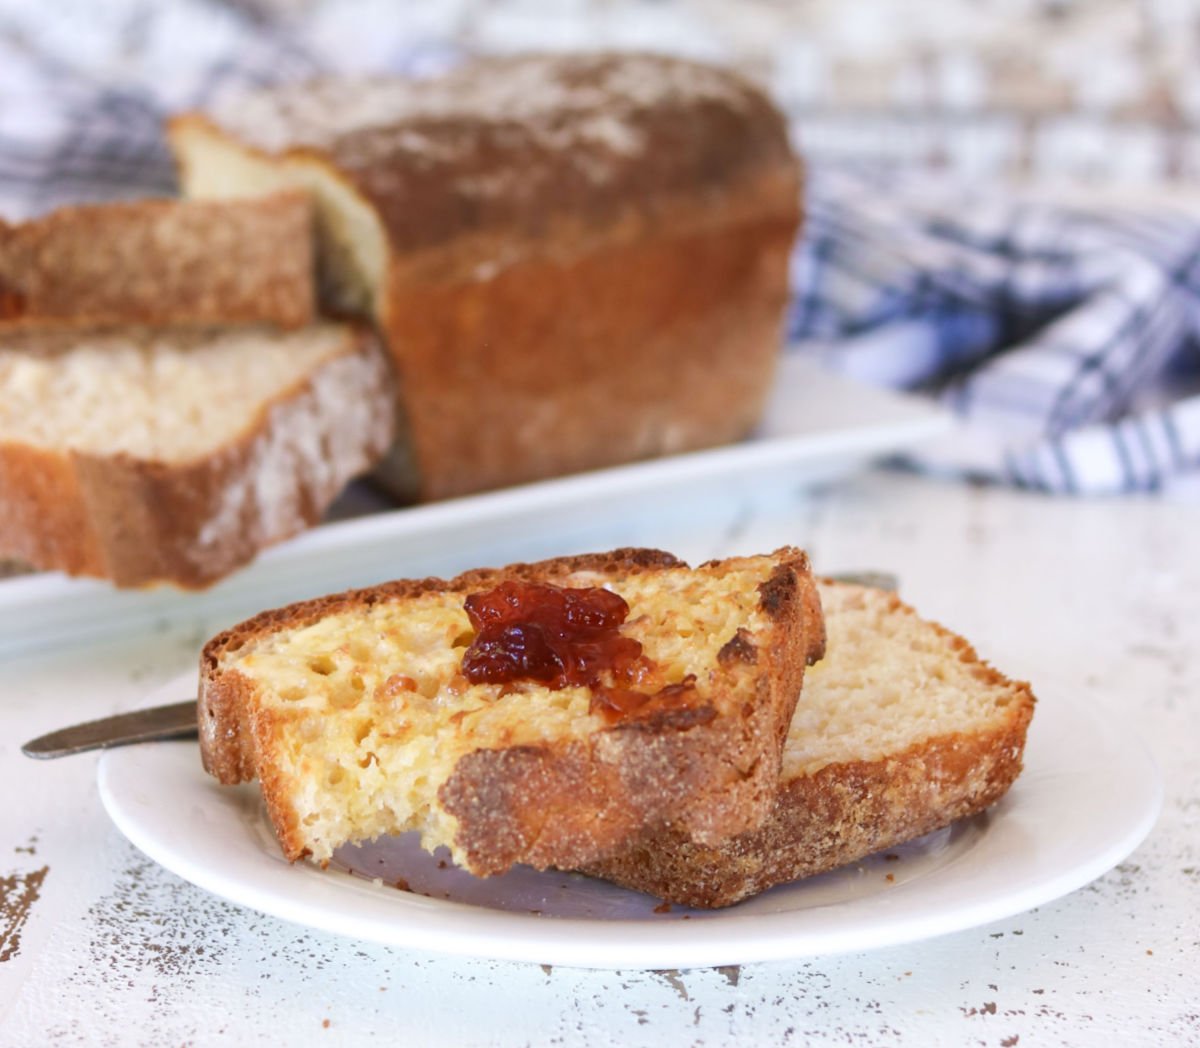
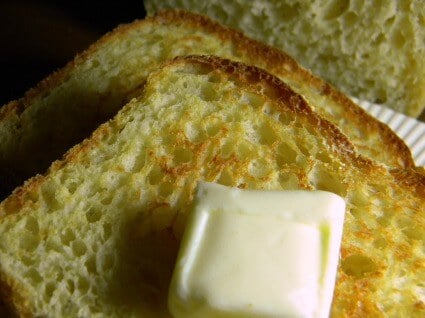
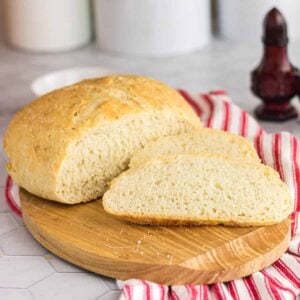
Tons of crags and craters plus the crusty bits make this English muffin bread the best!Table of Contents
🎥 Video
Get the texture right every time - watch this video to learn how.
❤️ Why you'll love it
Reader Review: (5 stars) Made this tonight, and I was a little nervous as I’ve never attempted bread before. Easy recipe to follow and turned out absolutely delicious!!! Was going to share my second loaf with a neighbor but I changed my mind after the first bite! ~Rachel
- Big, holey texture that butter and honey can pool into like real English muffins.
- Takes less than an hour!
- No kneading required.
Let's start with the fact that it's a perfectly toastable, no fail loaf. No kneading, waiting for hours for it to rise, you don't even need to pull out the mixer!
Stir the ingredients together, scoop in to a loaf pan, let dough rise for about 20 minutes and then bake! Yeast bread just doesn't get easier than this!
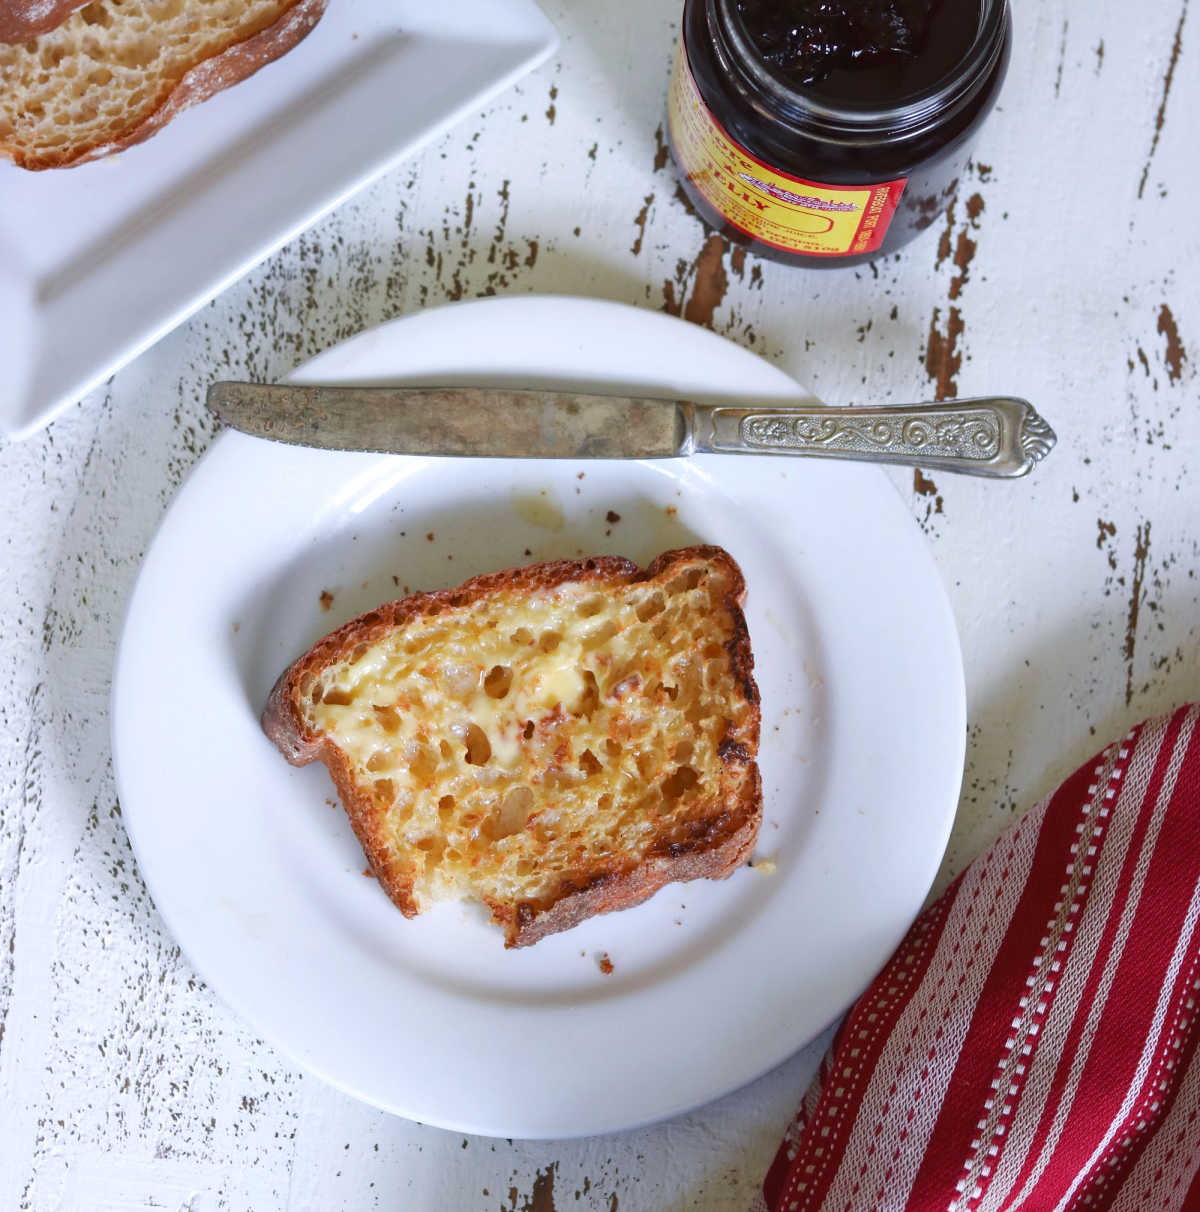
Homemade English muffin bread is delicious spread with melty butter and honey or jam... but try it for French toast sometime. It's unbelievable!
You might even love it better than regular English muffins.
Here's an easy no knead sandwich batter bread that you'll love, too!!
As an Amazon Associate, I earn commission from qualifying purchases.
📋 Ingredients
You'll just need basic ingredients for this recipe - most are probably in your pantry.
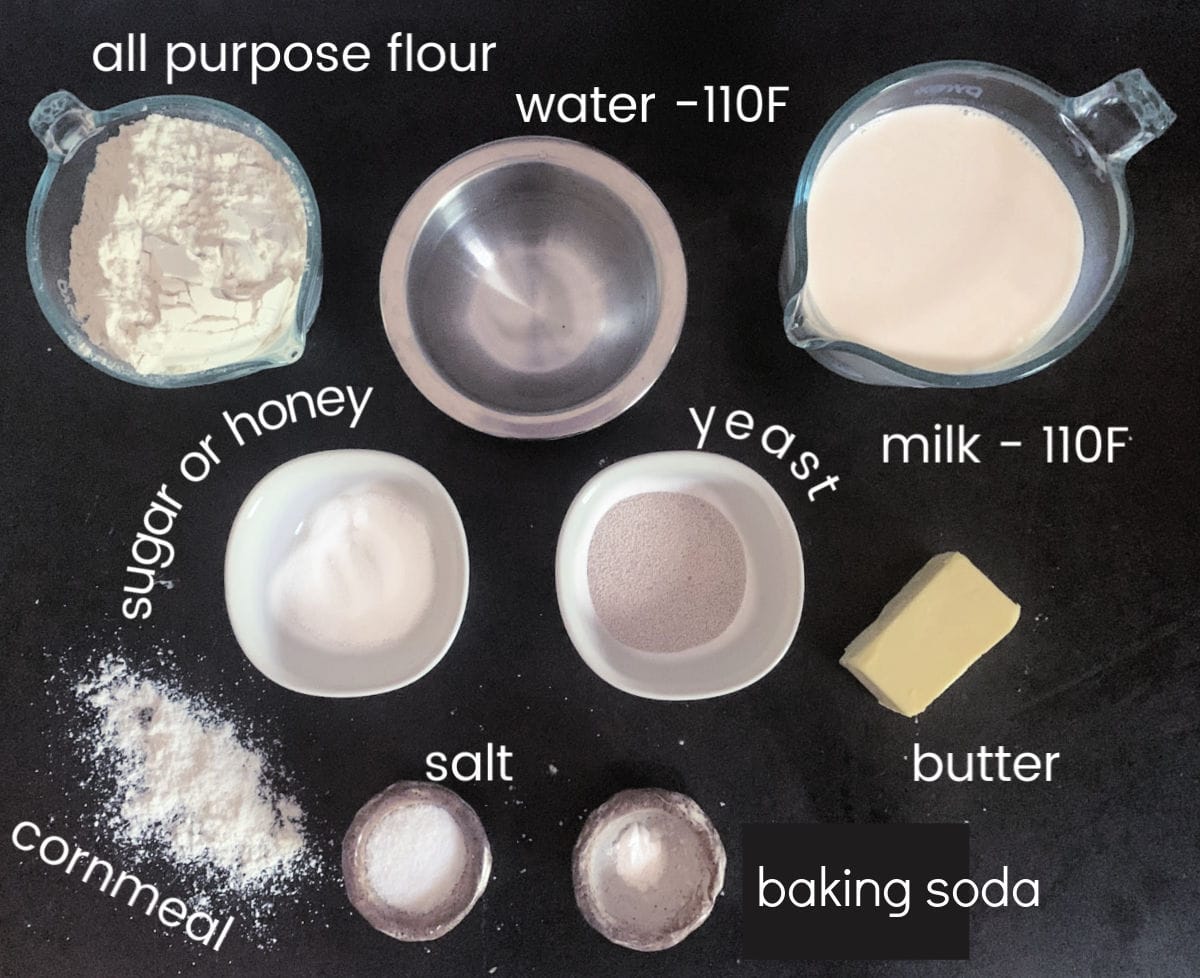
Simple ingredients for quick and easy English muffin toasting bread.I use Red Star active dry yeast. If you make bread a lot buy it in bulk and keep it in the freezer!
🔪 Instructions
This is an easy, no-knead yeast loaf. You don't need a mixer or a breadmaker - just a big wooden spoon!
Note: This is an overview of the instructions. The full instructions are in the green recipe card below.
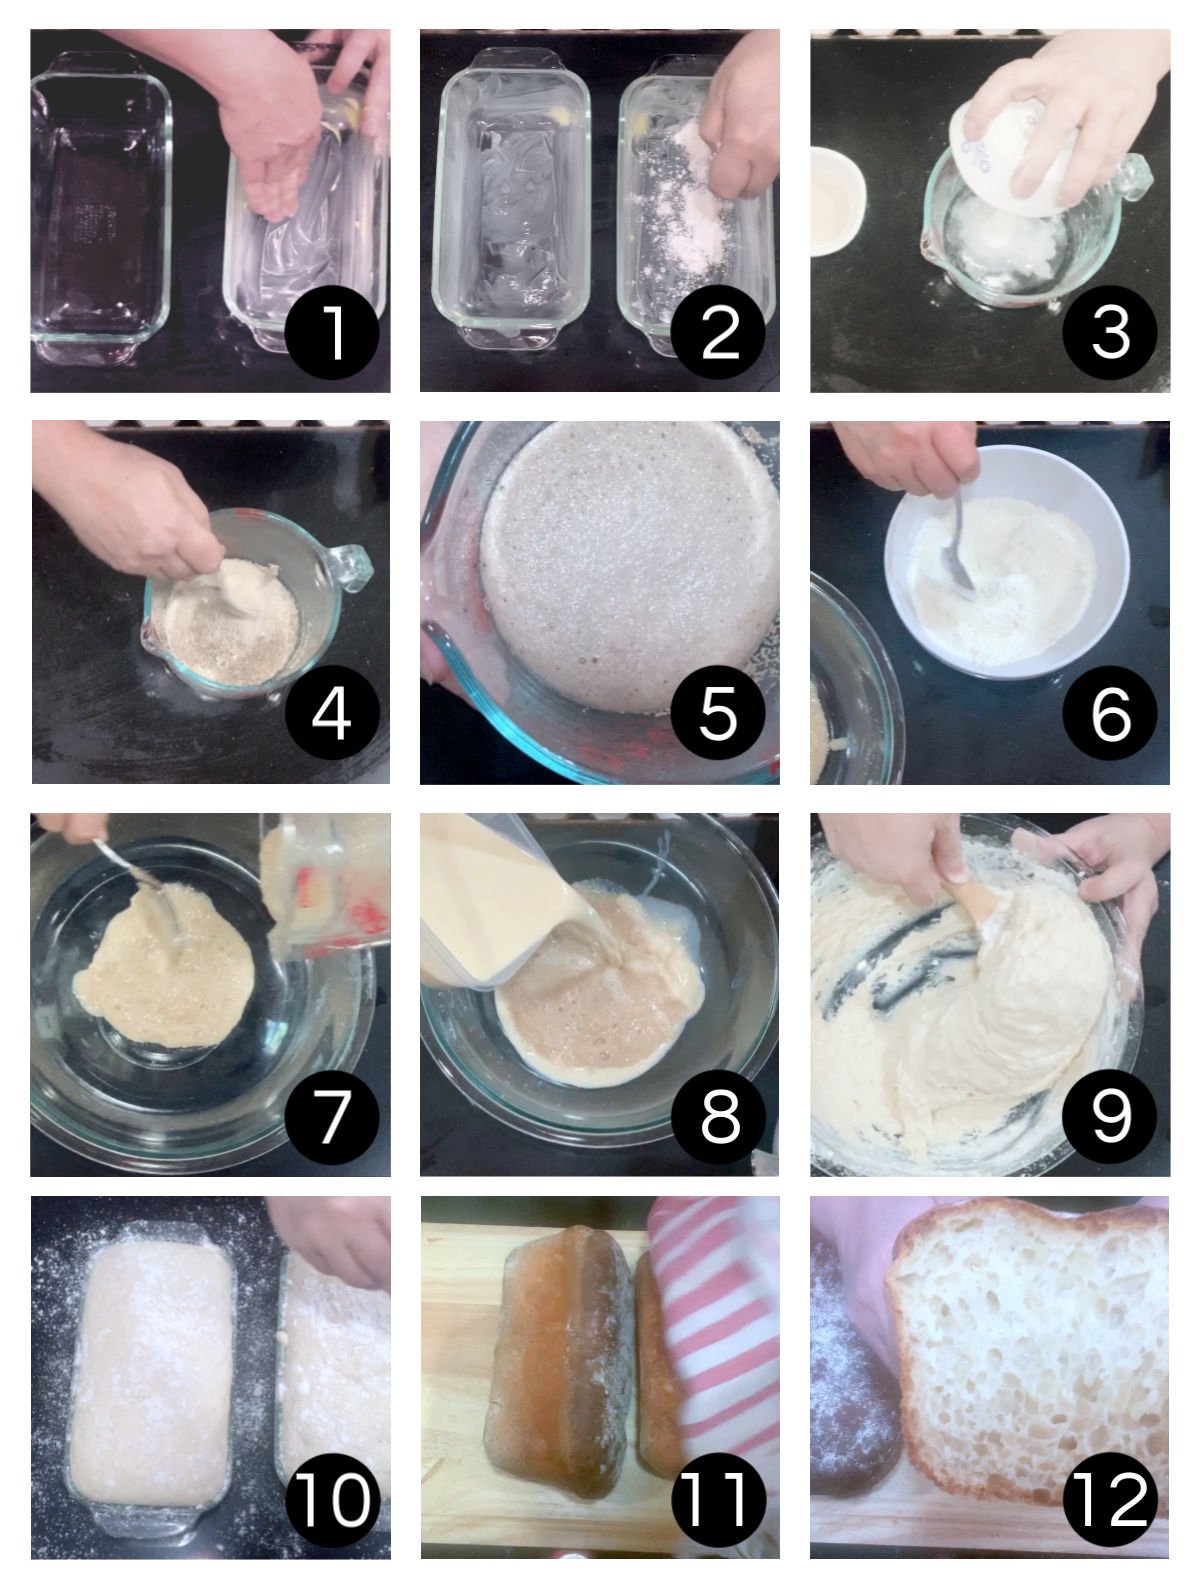
Note- my bread pans are 30 years old and I can't find the same size any more - 8x5 or similar will be fine.
- Butter two 9x5-inch bread pans.
- Dust with cornmeal.
- Add the sugar to the water in small bowl.
- Stir in the yeast.
- Set aside until foamy.
- Blend the dry ingredients.
- Add the yeast mixture to a large
mixing bowl . - Add the milk.
- Add ENOUGH FLOUR TO GIVE YOU A SOFT GOOPY DOUGH.
- Spoon the dough from the large bowl into each prepared loaf pan. Try to keep the amount of batter in each one equal. Set aside in a warm place to double. Dust the tops of the dough with cornmeal and bake until the top of the loaves are golden brown.
- Cool loaves.
- Slice.
🥫 Storage
This simple English muffin bread will stay fresh for a day or two if it's sealed in an airtight food storage container and kept at room temperature. From scratch recipes don't last as long as commercial loaves.
For longer storage wrap it securely in plastic wrap, then aluminum foil (or put it in a freezer container) and freeze for up to 3 months.
I like to slice it up, place parchment squares between the slices, and freeze it that way. When I need a slice or two it's easy to get out without thawing the whole loaf.
You may think I am crazy but this is the BEST bread to spoon leftover Angel Chicken over for a comforting, quick meal.
💭 Things to know
This is an easy bread recipe to stir together by hand. I DO NOT recommend making it with an electric mixer because it will get over beaten, even on low speed, and your perfect texture will be lost.
Expert Tip: You can let the dough for this English muffin loaf rise overnight in the refrigerator if you want to save time in the morning or if you prefer to develop the flavor more. Spray plastic wrap with no stick spray and cover the batter so it won't dry out.
- You can use instant yeast - just add it in with the dry ingredients and skip the first step.
- You can make two large loaves of English muffin bread with this recipe or you can double it and make four. I'd double it if I were you — it tends to disappear quickly and you can freeze it.
- Use coarsely ground cornmeal to dust the pans. It will give you that flavor and craggy texture that the conventional English muffins have. If you don't have any cornmeal you can just dust the pan with flour instead. Not a big deal but not as good either.
- Make sure your water temperature isn't too hot nor too cold. This is important! Use a thermometer if you're not an experienced baker.
- Just use all-purpose flour in this recipe.
- The batter should be very loose and gloopy. If you add too much flour you won't have those lovely nooks & craters, crags and crannies! See the video or step by step images for a visual of gloopy.
- Your rise time may vary. In a cool kitchen you may need a bit longer and in a warm kitchen it may be a bit shorter.
- Don't cave to the temptation to slice it and eat it while it's warm. Cool and then be sure to slice and toast it. It makes perfect toast!
- You don't need glass bread pans - any kind you have will be fine. I prefer glass but that's a personal preference not a requirement.
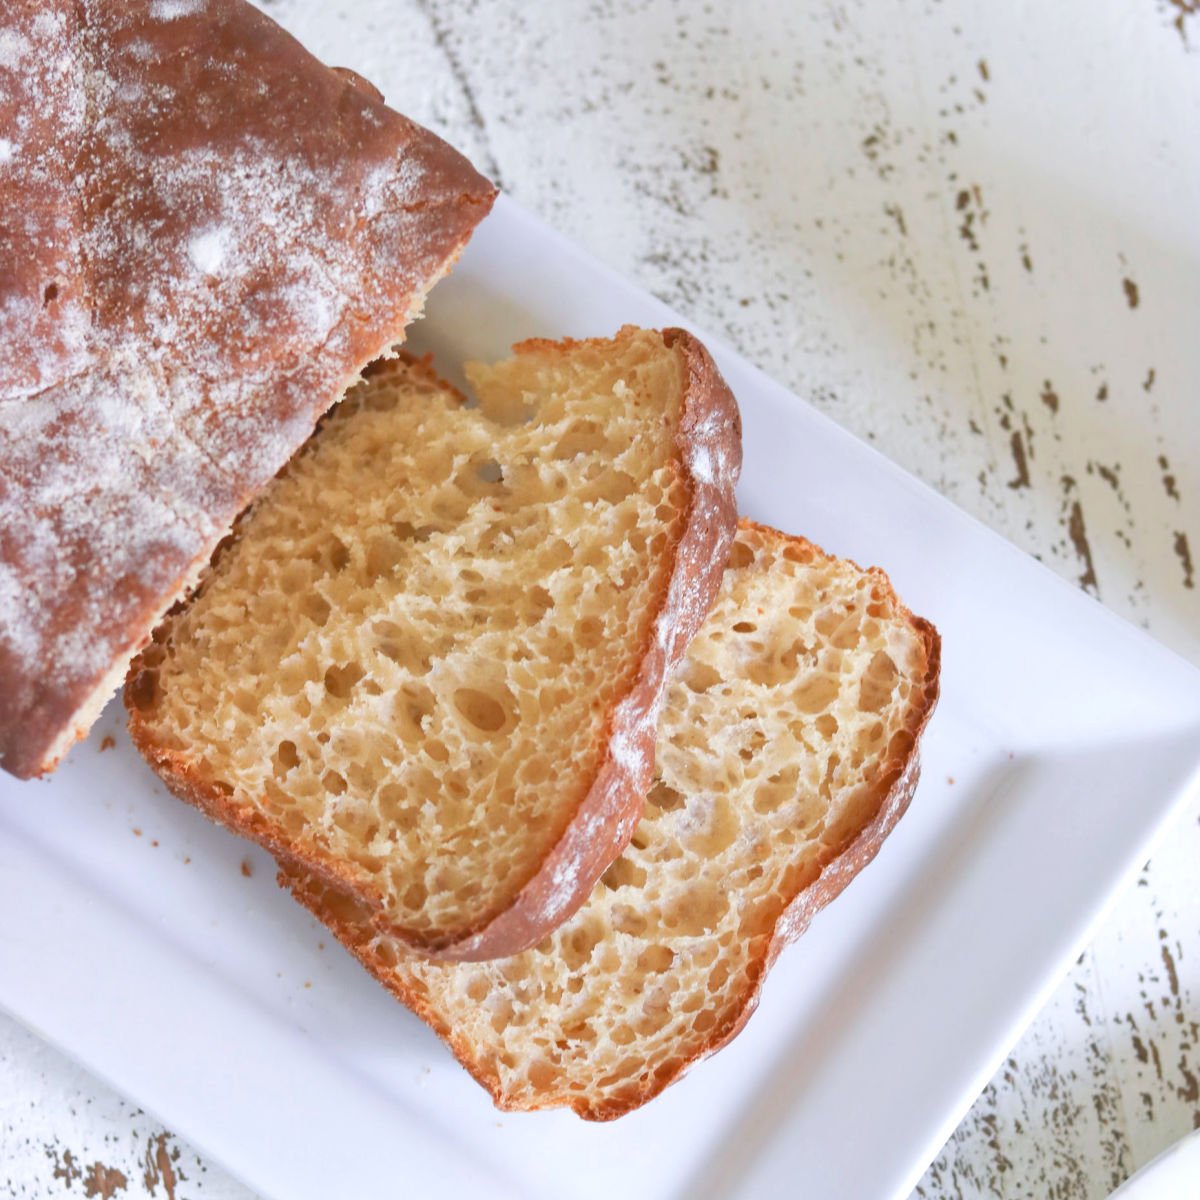
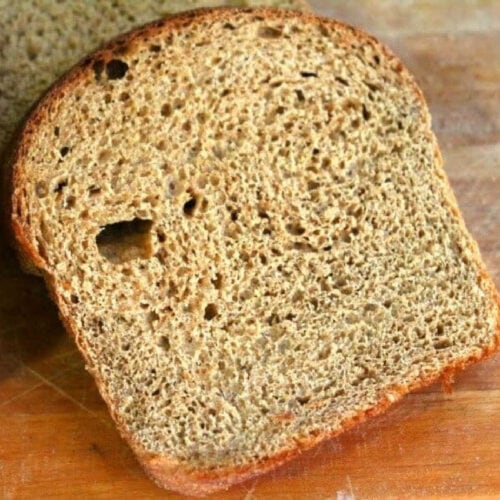
I've seen a lot of images for similar recipes (sometimes called toasting bread) on Pinterest. It bothers me that so many of the slices look almost exactly like a slice of regular bread.
As far as I am concerned it's not right unless it has that coarse, bumpy texture (to hold the butter and honey, of course) and distinct flavor. It shouldn't taste like bread at all! It's got to taste like a...
(say it with me...)... ENLISH MUFFIN!!!
Accept no substitutes!
👩🏻🍳 FAQs
Here are the questions I am most frequently asked about this recipe.
Yes you can but I don't recommend it. The bread machine over mixes the dough and you don't get the great texture. I had one reader say that it broke her machine. This ONLY requires stirring and it's so easy. Making it by hand is best. If you must - I've given instructions in the body of the post.
Not really. It does help give the English muffin bread that traditional flavor and texture, though.
There are a couple of ways. Using an insta-read thermometer is easiest. Just poke it down in the center of the loaf and it's done when it's 190F -200F. You can tap it and it will sound hollow. Once you get some experience you'll just know!
It sounds like it rose too long. Check out this troubleshooting guide for yeast doughs.
Yes, that should be fine!
2 packets will work just fine.
🔍 What Is Gloopy?
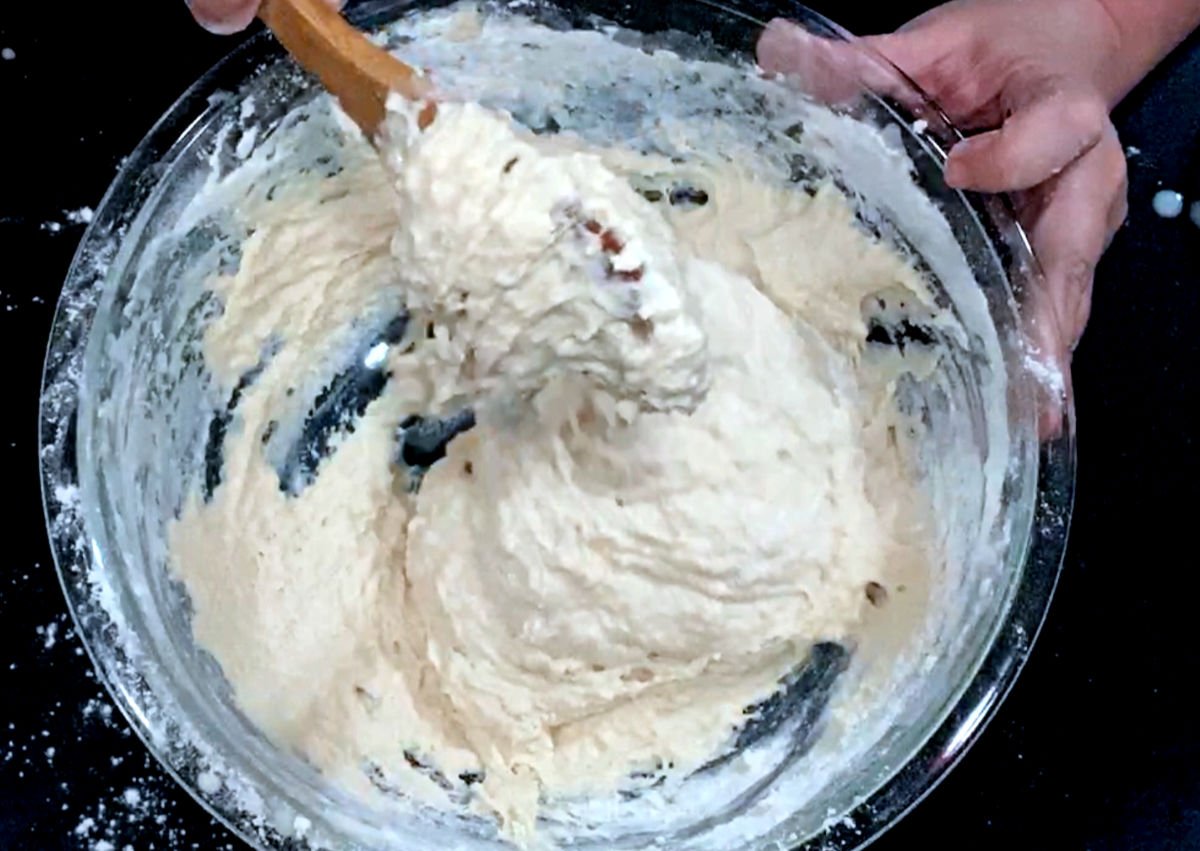
I've had so many people ask what a gloopy dough is so I grabbed one of the images from the video. This is the perfect texture!
It's a very wet dough. Usually if you can't get the bumpy texture like in my pictures you've added too much flour because you're afraid of the sticky dough.
📚 Related recipes
More homemade bread recipes
This cinnamon raisin bread is made right in a
📞 The last word
Make this easy egg bites recipe to go alongside! Add this rhubarb pineapple jam from my friend Deb at Bowl Me Over and omigosh...heaven.
Y'all, I've been making this SO many years and it never gets boring! So delicious and it works every. single. time.
Be sure to watch the video so you can see the texture that the dough should have. As long as you match that texture you'll be fine.
If you click on the number of servings in the recipe card you can adjust the measurements up or down for the exact number of servings you need.
If you love this recipe please give it 5 stars! ⭐️⭐️⭐️⭐️⭐️
📖 Recipe
English Muffin Bread Recipe
Print Pin Recipe Save Recipe Rate RecipeIngredients
- 4 ½ cups flour, you may need less or a little more
- 2 tablespoons yeast, or 2 packets
- 1 tablespoon honey, or sugar
- ¼ cup warm water, 110F
- 2 teaspoons kosher salt
- ¼ teaspoon baking soda
- 2 ¼ cups warm milk, 110F
- Butter and cornmeal for greasing and dusting the pans
Instructions
- Mix the yeast, honey, and water. Set aside.
- Stir the salt, baking soda, and flour together.
- Add the milk and one cup of the flour to the yeast mixture.
- Blend well.
- Add the remaining flour, OR ENOUGH TO GIVE YOU A SOFT GOOPY DOUGH and beat.
- You should have a very soft, goopy dough. Yes. I said goopy. See the video for a visual.
- Spoon the dough into 2 loaf pans that have been greased and dusted with the cornmeal.
- Set aside in a warm place until the batter has doubled and is at the top of the pans, or a little above. This may take 30 to 45 minutes.
- Preheat the oven to 425F
- Dust the tops of the loaves with cornmeal and bake for 15 minutes or so. Loaf will sound hollow when tapped.
- Bake for 20-25 minutes if you want a crisper, more golden crust.
- Cool and slice.
Notes
- The pans I use are 9x5-inch.
- ANY kind of loaf pan is fine - I prefer glass but you can use aluminum, cast iron, or whatever.
- You can make two large loaves of with this recipe or you can double it and make four. I'd double it if I were you — it tends to disappear quickly and you can freeze it if you need to.
- Use coarsely ground cornmeal to dust the pans. It will give you that flavor and slight texture that the conventional English muffins have. If you don't have any cornmeal you can just dust the pan with flour instead. Not a big deal but not as good either.
- Just use all-purpose flour in this recipe. No need for bread flour.
- The batter should be very loose and gloopy. If you add too much flour you won't have those lovely nooks and crannies.
- Don't cave to the temptation to slice it and eat it hot. Cool at least part way and then be sure to slice and toast it. It will be better that way.
- You can make this with whole wheat flour, half whole wheat and half white.
- Feel free to add raisins, dried cranberries, dates, etc. About ½ cup is right.
- You don't need glass bread pans - any kind you have will be fine. I prefer glass but that's a personal preference not a requirement.
- Cut the ingredient measurements in half.
- Place all of the ingredients in the bucket of your bread machine, or as instructed by the manufacturer.
- Program for basic white bread with a light crust.
- Remove when done baking.
Nutrition Facts
Nutrition information is estimated as a courtesy. If using for medical purposes, please verify information using your own nutritional calculator. Percent Daily Values are based on a 2000 calorie diet.
This recipe has been tested several times. If you choose to use other ingredients, or change the technique in some way, the results may not be the same.
Originally published August 2011. Last updated January 13, 2023 for editorial improvements.





Kathy says
Can you tell me which yeast you use…instant or active dry…the recipe sounds great…thank you.
Marye says
I use active but either is fine.
Angela says
I freaking love this bread. There’s no way it should be this flavorful with how simple it is to make. I even have the recipe to my dad who decided to throw raisins and cinnamon into it 🤤
Seriously yummy! Thank you for sharing!
Amanda says
I've made this recipe countless times over the last few years. It's been a hit with everyone who tried it that's for sure. The only thing you need to watch out for is not letting it rise too much before you bake it. I had one batch that had a big gap inside both loaves because I didn't keep a watchful eye. The recipe itself is amazing. The nooks and crannies are spectacular!
Fatima says
If I choose to put the dough in the refrigerator overnight do I have to leave it out of the fridge before baking?
Marye says
I usually only leave it out while the oven is preheating.
AMT says
Easy & Excellent. Have made it SO many times and turns out each and every time.
Georgianne says
Awesome! I make this all the time!!! I love this recipe. It turns out perfect all the time. It makes the best grilled cheese sandwich to have with tomato soup among many other endless options. This is a don’t miss recipe!!!
Katie Johnson says
This is the best bread ever! I went ahead and made it in my bread maker and did not half the recipe as recommended. I chose the basic bake function and medium brown function. I added about 1/2 c more water to get the dough nice and gloomy. After it was done I opened the lid and let it completely cool down. Truly great crust and texture.
Lisa Smith says
I love this recipe and have made it so many times.....I sell these at my local farmer's market. Sometimes my loaves sink in the middle and don't really achieve the height that I see in your perfect loaves. What am I not doing or doing wrong? I let the dough rise until it's just above the top of my 9x5 loaf pans and all ingredients are fresh. Please help.
Marye says
Try baking it before it rises above the top. There are a lot of variables in the flour from brand to brand - and so much more. I'd try baking it when it hits just below the top of the pan - it should still rise more in the oven. If that doesn't work try adding a tablespoon or two of gluten flour in place of the same amount of flour. Also - be sure that it cools away from drafts and air conditioning vents. I dont know why but that will make it sink as well. Good luck!
Shannon Dennis says
I’m having such a hard time getting those nooks and crannies and a good rise. I’ve tried the recipe twice. I’ve read all the tips and tricks and followed the video. My yeast bubbled greatly. I’m not sure what I’m doing wrong. We go through sooooo many English muffins and I want this to work so badly!
Marye says
If there are no nooks and crannies your dough has too much flour. This is a classic no-knead dough. What is the size of your bread pan?
Amanda says
Do you weigh your flour? Or do you scoop it up? It sounds like you're using too much flour. Are you using instant yeast? If you scoop the flour, try weighing it on a digital scale. I have a little spread sheet I use for weights of my various baking ingredients on the inside of my cupboard door. I find that 120 grams for a cup of flour the perfect weight. Easy to divide too. Good luck!!
Kathleen A Harrington says
Since I am the only one to eat this, I halved the recipe. Worked out so well. I now realize that my idea of gloopy and yours are just a bit off. I'll use a little less flour the next time. Will make a whole batch the next time though.
Lou says
Don’t know if I did something wrong or not but 45 minutes in and it’s not even close to doubled. Hope it doesn’t ruin it by leaving it longer to try to rise. Haven’t done yeast bread before really.
Marye says
If it's not rising then the liquid might have been too hot, the yeast might have been old, if you're using air conditioning the kitchen may have been too cool for it to rise quickly...or your water may be chemically treated - that sometimes does it.
Erin says
I noticed that when the recipe says to mix the flour, salt and baking soda there isn’t any mention about just mixing 1 cup of flour and not mixing all 4 1/2 cups of flour with the baking soda. I’m hoping for the best for my loaves but not sure how they will be since I didn’t get the full baking soda and salt in them since I didn’t need all my flour. Just wanted you to know. The video was helpful, just wish I watched it before mixing up the batter.
CAROLINE says
I had the same experience. I normally just jump to the recipe, so didn't watch the video. The recipe needs to be adjusted to give the direction to separate the flour before mixing with salt & baking soda.
Laura. Van Vliet says
My grandsons loved this bread and requested it again
the next day. It was easy to make. I do have a question about making the dough the night before. You said to put it covered in the refrigerator and I was wondering if you put it in the pans or just keep the dough in the the bowl till morning and then put it in the pans. Do you need extra cooking time because it will be cold?
Marye says
I put the dough in the pans, spray plastic wrap with nonstick cooking spray, and cover. The next morning I pull the pans out of the fridge and give them 10- 15 minutes on the counter then bake as directed. You could also leave it in the bowl, add to pans in the morning and let rise for a bit.
Rachel says
I make this every week for my family's breakfast, with half whole wheat flour. It doesn't get as many nooks and crannies but it works much better with the two type 2 diabetics in the house. And we like whole wheat breads here. It's also far cheaper than buying stuff and tastes so much better.
Marye says
I'm glad you like it! You might try substituting 2 tablespoons of the flour with gluten and see if that helps with the nooks and crannies.
Misty says
I've made four loaves so far somw from the fridge and the other not they rise nicely when they cook ip they deflate so much they are half the size they should be. They taste amazing but so small. I am not sure what I am doing wrong. I keep trying though lol
Marye says
Usually if they are deflating it's because you've either let them rise too much, not used enough flour, or they aren't baked all the way through.
Steve C says
This recipe gave excellent results and gained a top mark review from my good Lady. However the slices from the loaves are smaller than I would like. Can it be made as a single large loaf without the outside burning before the inside is cooked? If so, how should the bake timings be adjusted? Keep up the brilliant work.
Marye says
Thanks Steve. Honestly I'm not sure - I've never done it that way.
Steve C says
I’m going to try it and I’ll let you know the outcome. I’m pretty confident that it will work - my Good Lady wants it as a regular feature for her daily sandwiches.
Julie says
In your YouTube video you mix 1 c flour with the baking soda. In the instructions you don’t. Can be a bit confusing for some. Overall good bread.
Doug Swanson says
I made your bread just as you said. I changed the volume measurement to Grams. I did this because mine dough was always dry, didn't raise. I have since adopted the goopy method and only adding flour to the desired consistency, not just per the recipe amount of flour.
My results flavor and texture wise is perfect, thank you. The center of the loaf has sank both times. I tried a third time. This time mixing it longer and added a touch more salt. I read that mixing it longer, and salt increase the gluten structure so it would support itself better, nope. Loaf center fell again.
Any ideas on the center falling
Mine bread had risen in about 25 minutes
Marye says
The center drops when there's not enough flour, the flour doesn't have enough gluten, or it's raw in the center. I don't weigh ingredients so I am not sure what's going on.
Josa says
Sure wish the instructions matched the video….I may have to throw the first batch away. Your instructions need to be more thorough. Like SET ASIDE FOR 5-10 mins, not just “set aside” I went back and read it multiple times and thought, surely if I needed to wait any length of time it would say so…so. Here goes nothing
Marye says
If you're talking about the yeast - it's true I let active dry yeast proof for 5 to 10 minutes. I am sorry that that was inadvertantly left out of the instructions - to my knowledge no one has mentioned it in the over 10 years it's been on the blog. Letting yeast proof isn't necessary any more... I prefer to do it that way. If your bread didn't turn out it wasn't the yeast issue.
Lucy says
In the oven now. Watched your video several times to make sure I got the gloop right. Very helpful. Also added 1/4 tsp ginger to yeast per your suggestion, I’ve NEVER seen yeast proof like that. I swear it was at least 6” tall in the bowl. Hopefully not over proofed, but i got too busy measuring out my flour etc. My question is how long to leave in the pan to cool before flipping from pans?
Marye says
I usually put the bread pans on their sides and cover with a tea towel for about 5 to 10 minutes.
Lucy says
Thank you for the quick reply. Unfortunately both my loaves sank in the middle. Still taste wonderful though. Just look weird, haha. And I got the craggy look, light and airy. As I said, that yeast poofed up really high. Maybe it was exhausted when I added the flour mix to it. It also took a very long time to rise to the top after I put in pans, over an hour. Will certainly make again, it’s definitely a keeper. Is it possible to over mix before putting in pans?
Arline says
Delicious and so easy! Thanks for sharing this recipe. I made it three times now with 2 packets of yeast and 4 cups of flour (it’s a dry climate in Colorado) and it came out perfect each time. This recipe is definitely a keeper. Again, thanks! 😊
Marye says
Thank you, Arline! I am so glad you like it.