Bring the fresh flavors of Italy right to your kitchen with this easy, homemade pasta dough. This simple recipe will have you rolling out perfect pasta in no time at all.
Table of Contents
- it always turns out wonderful...
- 🗝️ Key takeaways: why this recipe is your new favorite
- 🧾 Gather your ingredients: what you'll need
- 📖 Make it your own: yummy variations
- 🔪 Step-by-step guide: instructions for success
- 🍴Must have tools: essential equipment
- 🥫 Leftover love: how to store homemade pasta dough
- Marye's Tip o' the day
- 💭 Insider tips: things to know
- 👩🍳 Let's answer those questions: FAQs
- 📚 More Southern comfort: related recipes you'll love
- 🍽️ No waste: creative ways to repurpose
- 📞 Wrapping it up: the last word
- 📖 Recipe
- ✍🏻 A note from Marye...
- homemade pasta
- 💬 Comments
Save this recipe by clicking on the ❤️ heart on the right-hand side of the screen or in the recipe card.
🗝️ Key takeaways: why this recipe is your new favorite
- This fun, hands-on cooking experience is fabulous when you are having a little Julia Child moment.
- This is a no-fail recipe that's great for making pasta dishes from scratch. Are you going to do it all the time? Probably not, but it's satisfying to know how when you want to.
- You will probably want to do most of this in your mixer unless you have arm muscles like the Incredible Hulk. I used to knead this stuff by hand, but I am not that interested in firm youthful upper arms anymore—at least not interested enough to actually knead this.
With just 4 ingredients that you probably have in your pantry right now you can make the best homemade pasta dough you've ever tasted.
Why is this the best? It's simple, it works, and it's easy to make for beginners! Step-by-step instructions and images help you all the way through.
Y'all know I'm not gonna leave you hanging.
🧾 Gather your ingredients: what you'll need
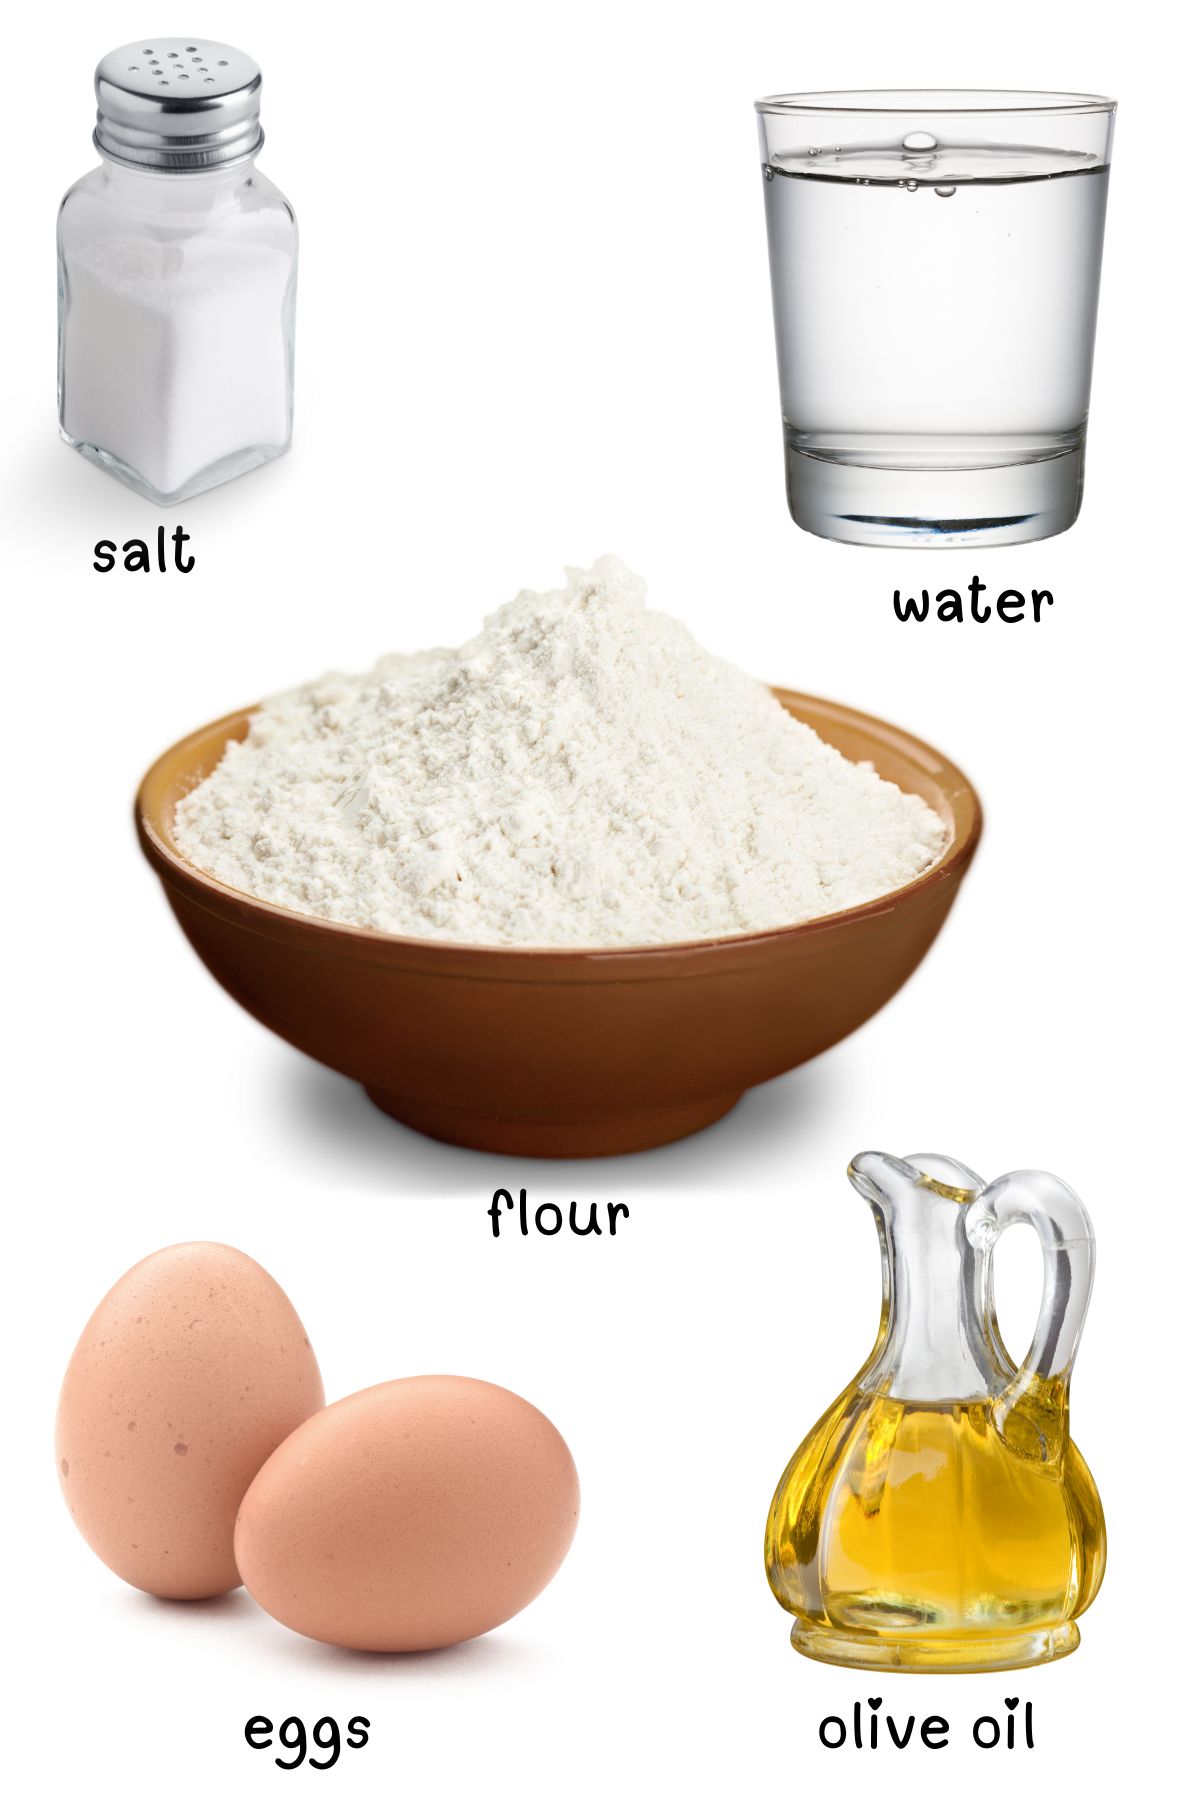
This is an overview of the ingredients. You'll find the full measurements and instructions in the green recipe card (printable) at the bottom of the page.
📖 Make it your own: yummy variations
- Add color: Add spinach or tomato puree to the dough for colorful pasta.
- Make it rustic: Use whole wheat flour for a healthier option.
- Flavor it: Infuse the dough with herbs like basil or parsley for extra flavor.
🔪 Step-by-step guide: instructions for success
Step 1: Mix
- Add ingredients to the bowl of your mixer.
- Mix slowly, adding more water as needed until the dough can be formed into a ball that holds together.
Step 2: Knead
- Knead for about 3 minutes, either with your mixer or by hand. Dough should be smooth and elastic.
- Once it is kneaded you will form it into a ball and let it rest for about a half hour. This allows all the gluten that you have developed to chill out and relax. Just leave it on the counter with a towel tossed over it.
Step 3: Pasta roller
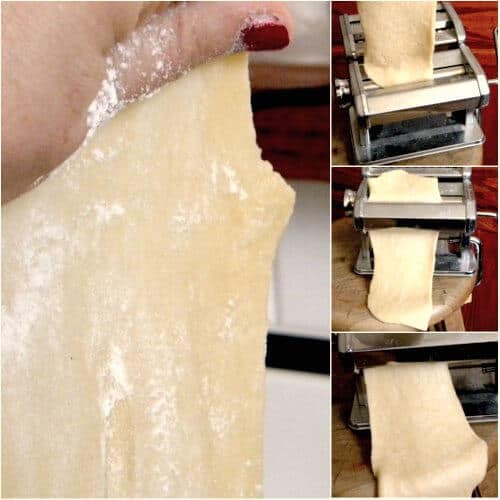
You can roll the pasta by hand with your rolling pin but it is more difficult to get it exactly right. I highly suggest a manual pasta roller - they're not very expensive and they work very well.
It is usually thicker when made that way which does detract from the delicacy of the finished dish.
If you have a Kitchen Aid you can buy a pasta attachment and there are actual electric pasta makers, too. Personally, even though I have an electric pasta maker I prefer the hand cranked kind.
The one I have is pictured above and I think it is worth every penny. It is heavy duty and easy to use. It is easy to clean up...and it doesn't get bogged down with whole wheat or vegetable pasta doughs.
I attach mine to a plain wooden stool. It works best for me. You can attach yours to the table, counter, or whatever is convenient. It just needs to be stable.
Experiment to see how thin you like your pasta - and you will probably find that you use different thicknesses for different dishes. For lasagna I stop with a #3. This particular pasta maker has 9 different settings. Anyway you just keep feeding it through until you have the thickness you want.
Just keep feeding the pasta through the machine until it is as thin as you want it.
- Cut the dough into 4 parts.
- Roll each part into a rectangle with your rolling pin.
- If you are using a pasta maker like the one above you will set it on #1 and feed the dough through 4 or 5 times.
- Then you will set it on #2 and feed it through 1 or 2 times.
- I usually set it on #3 for a thinner pasta and feed it through again.
Step 4: Shaping
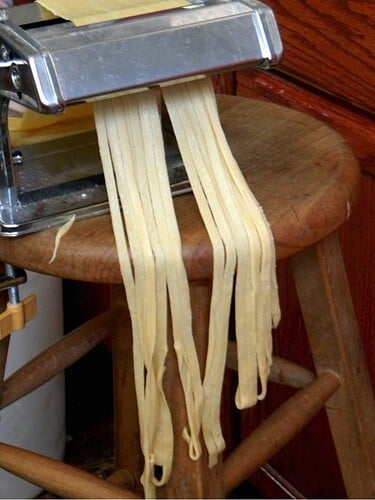
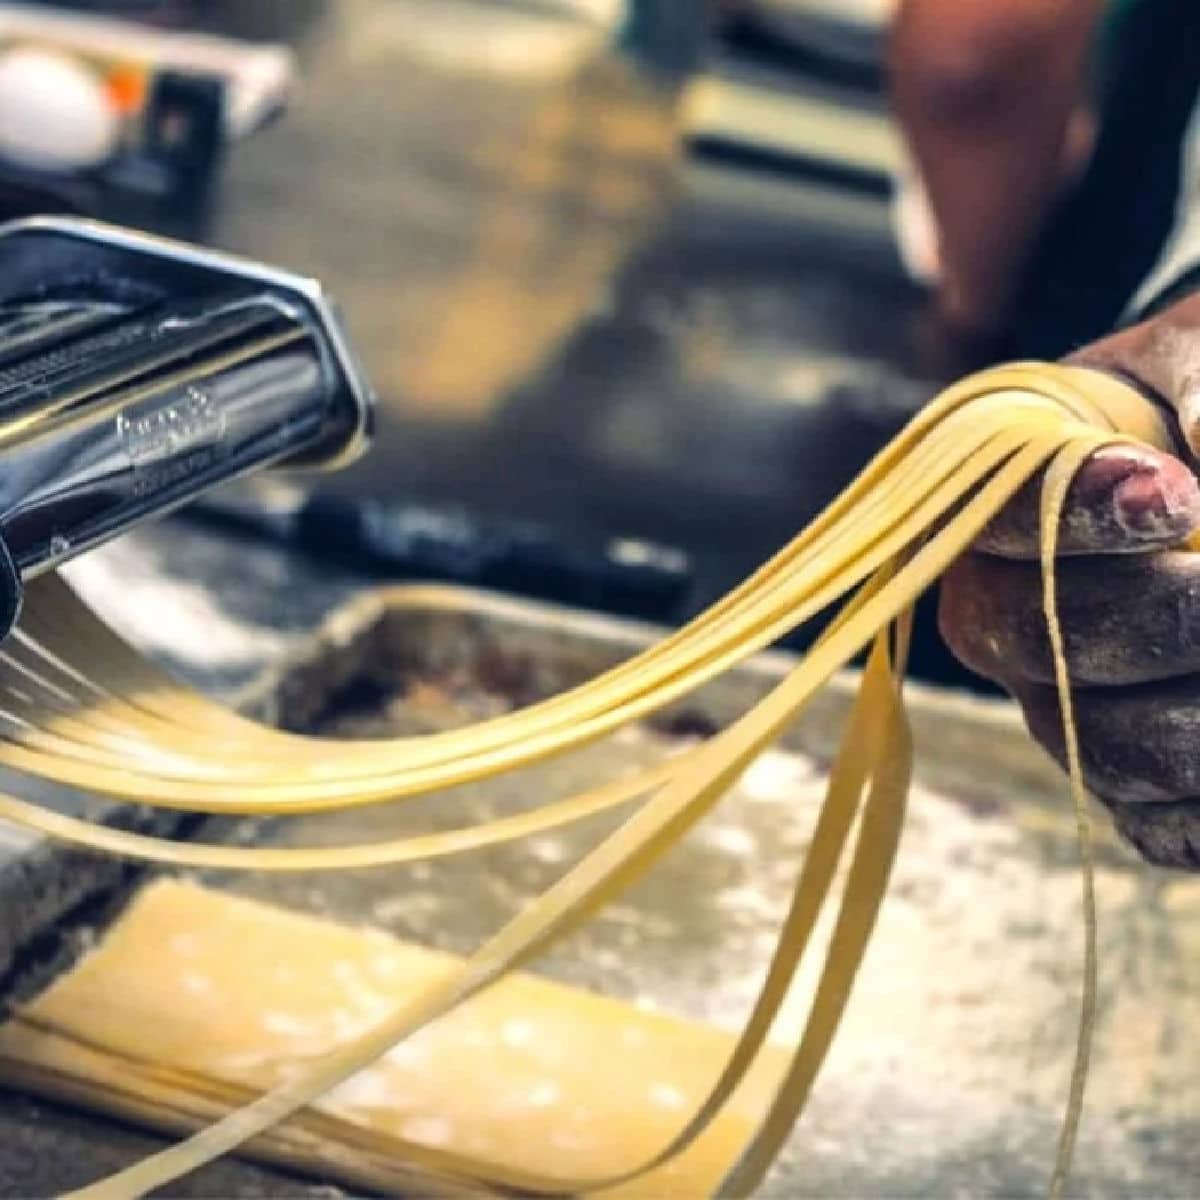
Once that is done it is ready to be cut into the shape you desire. Most of the hand cranked pasta makers just have two different flat noodle settings but you can buy extra attachments for different shapes.
For lasagna you don't need to cut it with the pasta maker. Just measure the length of your lasagna pan and cut it short enough to fit. Use as many pieces and you need for the width.
For fettuccine or linguine you will just feed the homemade pasta dough through the proper sized cutters on the machine (usually on the back) and it will be automatically cut to size.
Step 5: Drying
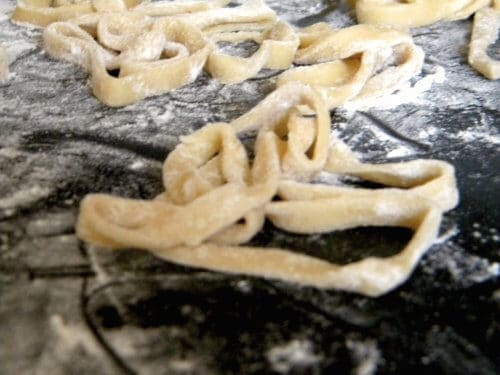
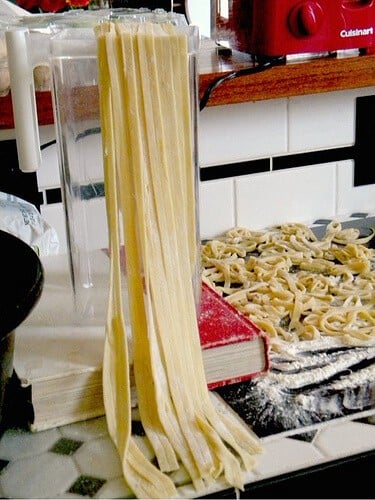
I usually let homemade pasta dough dry for a half hour or so before I cook it but you don't have to.
Keep in mind that fresh pasta will cook VERY quickly. Test it after 2 minutes.
You can even use the lasagna noodles in the lasagna without boiling it first - I don't like to do that because I think it gives it a raw doughy starchy taste but other people say it is fine.
Try it and see if it works for you - after all you will save about 2 minutes. 🙂
🤫 Marye's secret for zhuzhing it up -
I like to add a tablespoon or two of finely minced chives or basil to the dough as I'm kneading it. It adds flecks of color and flavor.
zhuzh: verb. To make something more interesting or attractive
🍴Must have tools: essential equipment
- mixing bowl
- stand mixer for kneading (recommended but not necessary)
- pasta machine (recommended but a rolling pin will work)
🥫 Leftover love: how to store homemade pasta dough
Store any leftover pasta dough in plastic wrap in the refrigerator for up to 2 days.
You can also freeze it for up to a month as long as it's covered in plastic wrap AND placed in an airtight container. You don't want it to dry out.
When ready to use, let it thaw at room temperature before rolling out.
Marye's Tip o' the day
Always allow the dough to rest for at least 30 minutes before rolling it out. This helps relax the gluten and makes it easier to work with.
💭 Insider tips: things to know
- If the dough feels too dry, add a little water a teaspoon at a time.
- For a smooth dough, knead it until it's soft and elastic.
- Dust the dough with flour as you roll it out to prevent sticking.
👩🍳 Let's answer those questions: FAQs
Have other questions? Ask me in the comments!
Semolina is the flour mostly used in homemade pasta but all-purpose flour can be used as well. Whole wheat flour works best if you use part all-purpose along with it. Get to know the different types of flour and you'll be able to come up with your own combinations.
Fresh pasta can be refrigerated for two days or so. You can freeze it for longer storage.
⏲️ Marye's time saving hacks -
Make the dough in large batches and freeze portioned balls for quick and easy homemade pasta anytime.
📚 More Southern comfort: related recipes you'll love
🍽️ No waste: creative ways to repurpose
Leftover pasta can always be added to soup to make it a heartier dish.
📞 Wrapping it up: the last word
Homemade pasta dough is really quite simple, pretty fast and very inexpensive. It is messy and that is the one negative about making your own pasta.
Maybe it is just me - I tend to be messy anyway. You don' believe me? Who found red food color on her upper thigh when she had been wearing jeans? Yep. Me.
When I get done in the kitchen it looks, more or less, like someone took the flour scoop and just pretended it was fairy dust and I was Wendy (from Peter Pan).
Fly!
This is my favorite homemade pasta dough recipe. It's probably not one of those recipes you'll make on a busy weeknight but it's fantastic for a family dinner on the weekend.
If you click on the number of servings in the recipe card you can adjust the measurements up or down for the exact number of servings you need.
If you love this recipe please comment below and give it 5 stars! ⭐️⭐️⭐️⭐️⭐️
📖 Recipe
Best Homemade Pasta Dough Recipe…Ever
Print Pin Recipe Save Recipe Rate RecipeIngredients
- 3 ½ cups All purpose flour
- 1 tablespoon Salt, , I use Kosher salt - you will need less if you use fine salt.
- 4 Eggs
- 1 tablespoon Olive oil
- 4 tablespoons Water, you may need more
Instructions
- Blend the flour and salt together.
- Add the eggs, oil and half of the water.
- Mix slowly, adding more water as needed until the dough can be formed into a ball that holds together. Don't let it get too wet or it will be hard to work with.
- Knead for about three minutes, or until the dough is smooth and elastic.
- Cover with a clean tea towel and allow to rest for thirty minutes.
- Divide the dough into 4 parts.
- Roll each part out on a lightly floured board so that it will fit through the #1 setting on your pasta maker.
- If you are rolling by hand just roll each piece of dough out until it is as thin as you can get it and cut into the desired sizes.
- Rub a light coating of flour on the dough.
- Put the dough through the #1 setting about 5 times or more.
- Change to a #2 setting and put the dough through that setting two or three times.
- Change to a #3 setting and put the dough through that setting.
- Continue to make the dough thinner until it is as thin as you want it.
- Cut into desired shapes and allow to rest for 10 minutes or so.
- Place in salted, rapidly boiling water and cook until done - 2 or 3 minutes.
Notes
- You can use whole wheat flour, semolina flour, or a combination if you like.
- You can substitute vegetable puree for the water.
- I'd suggest following the recipe exactly before trying any variations.
Nutrition Facts
Nutrition information is estimated as a courtesy. If using for medical purposes, please verify information using your own nutritional calculator. Percent Daily Values are based on a 2000 calorie diet.
This recipe has been tested several times. If you choose to use other ingredients, or change the technique in some way, the results may not be the same.
This post has been updated from the original March 2012 version. Last updated August 10, 2024 for editorial improvements, easier instructions, and better experience.
✍🏻 A note from Marye...
I know y'all don't always like the stories bloggers tell so when I have one I try to put it at the very bottom so you can read or skip as you like.
This article was super popular when I published it. People loved the recipe, it was easy to make, and it made fresh pasta approachable and doable.
Then one day someone made a comment about how gross it was that I used a (clean) wooden stool to clamp the pasta maker on... and I got embarassed and I stopped sharing this post.
In the past 8 or so years since that happened thousands of people missed out on a really good recipe because I allowed one person to get to me and make me feel less than.
I bet it's happened to you, too. Listen, the world needs you - your gifts and talents. Don't let one or a few people switch off your light just because it's bothering their eyes. They can always look away, right?
Be the biggest you that you can be - for all of us. ❤️

Don't lose this recipe!
homemade pasta
Pin to your favorite Pinterest board to keep it handy.





Rhea says
It was super easy to make and so delicious! Very pleased with how it turned out
Marye Audet says
Thanks! Im glad you liked it!
Lisa Gueths says
Amazing pasta. I could eat it plain it's so good
Marye Audet says
🙂 thanks! I am so glad you liked it!
Mark says
Marye
I used "00" flour I ordered on Amazon from Italy and I think it made all the difference. I've made before with conventional flour ,not as good.
Mark
Marye Audet says
Great idea!
Miss says
Thanks for the great recipe and tips with the dough. I struggle with the drying process. I don't have a drying rack. Can you just lay it out on wax paper for thirty minutes or need hang it from something? How long does it need to dry when you make a large batch and want to keep the noodles to use at a different time? Thank you!!
Marye Audet says
I've never kept them to use at a different time so I am unsure. You can cover them and keep them fresh in the fridge, though. They do need to hang... I've suspended wooden spoons between pans and done other things to create a drying rack. Use your imagination. 🙂
Tiffany says
I used plastic clothes hangers and hung from an over the door hook.
Marye Audet says
brilliant!!
Donna BAILEY says
One of the neatest drying rack I ever saw was a few of those large plastic coat hangers. Hang the pasta over them. Hang the hangers maybe in the kitchen where it’s the warmest. Use your imagination. Also use wooden dowels suspended somewhere in your kitchen. Tell your husband you heard it was impossible to do....tee hee
Jo Carson says
Wrap Saran wrap around a clothes hanger and drape the pasta over it like you would a pair of pants. The Hager can then be hooked over a cabinet knob.
Marye Audet says
Brilliant!!
Jacquelyne says
Hi, I just finished rolling the first ball of dough (I'm doing it by hand.) Something's come up, can i leave the dough to rest???? Or is there some way I can cook them and then use them some other day?????
Marye Audet says
You can let the dough rest ... or you can oil it and put it in a container or storage bag and then keep it refrigerated. Let it come to room temp before you roll it out.
Trish says
I have made this recipe numerous times and it always turns out wonderful! It works great with my kitchen aid attachment and the family scarfs it down. It reminds me of when my Grandma made fresh pasta by hand for soup. Thank you. ?
Marye Audet says
🙂 Thanks!
Marye Audet says
Yes it should be fine. 🙂
Lisa says
I tried the recipe that came with my pasta maker, but it was so dry it crumbled coming through the machine. Your recipe also has just the littlest bit of liquid. What should the dough feel like when it's resting? Can I add water if it seems too stiff?
Marye Audet says
Hmmm... it feels like stiff playdo if that makes sense? If you think it's too dry you can add a little water, yes.
Dee says
Make sure all ingredients are at room temperature before starting.
Yes you can add water and re knead. Let rest before putting it through pasta maker.
Karen @ The Food Charlatan says
I'm the same way! When I'm done cooking it looks like a bomb went off. Haha! I never have made my own pasta before. This looks so good! Looking forward to the lasagna 🙂
Dee Dee (My Midlife Kitchen) says
I love the delicacy of homemade noodles. They just make any dish taste better! My husband has actually been wanting to spend a day making pasta (what a catch he is!), so now I can hand him this recipe and let him go!
Chrisy @ Homemade Hooplah says
I saw my mother in law make pasta from scratch, and it tasted amazing, but that crafty woman wouldn't share the recipe :O Looking forward to trying this one!
Kay says
Can you use this dough for homemade pot pie which I cut in squares?
Marye Audet says
Yes you can. 🙂
melissa says
I made this tonight and it was perfect! I had double the amount of dough that I needed for the meal, can I freeze the rest of the dough, does it do well once unthawed? Thanks for sharing!
Marye Audet says
I have not tried freezing it but I don't see why you couldn't. 🙂
allie @ Through Her Looking Glass says
Looks super delicious Marye. Great tips. I love homemade pasta. The BEST!
Kelsey @ Snacking Squirrel says
this is brilliant! fresh pasta makes the difference always! <3
Sariah says
Do you fold the dough in half between each time you put it through the pasta maker? Or just straight in each time? I've seen on food network that they fold it in half sometimes. So I wanted to make sure 🙂 thanks! Can't wait to try it
Marye Audet says
I just put it straight through. 🙂
Randall says
Hi! Thanks for the great site! How do you clean your hand-cranked pasta roller? Thank you in advance for your reply!
Marye Audet says
There shouldn't be anything to clean really. The dough shouldn't stick to the rollers. If I notice a buildup of flour I use compressed air or gently wipe it with a dry cloth.
Randall says
Thanks Marye! (In case you didn't notice, I'm a pasta newby!)
Chelsea Tyree says
im making this recipe right now as we speak! Dough is resting for thirty minutes before I roll it into a rectangle, and so far so good! 🙂 love this recipe! Wondering if you can freeze these and then re cook them? Hmm.. 🙂
Marye Audet says
I think you can freeze them - it's worth a try!
Debby Ann says
Yes, you can freeze them, I do so on floured parchment paper in piles of cut pasta...or single layer if making Rolled up pasta with cheese mixture inside...like shells, or rolls of lasagne noodles. I put mine in parchment paper and wrap in foil as flat and tight as possible after freezing individually. When baking, pull out and put in baking dish with sauce on bottom of dish. Then, shells, and then, Cover with sauce and cheese in oven so the pasta stays soft. We make pasta now..but made so much at our Inns for 16 years. So easy and much more delicious. I also freeze pasta dough but make sure you flatten it out a bit before freezing. I take it out of the freezer a day or two in advance of using to defrost.
Karen Gasparini says
Have you ever frozen the pasta after you make it? Thanks!!
Marye Audet says
No Karen, I haven't. I've heard you could though. 🙂
Jamila says
Fresh pasta--so good, you can enjoy it with just melted butter and/or grated parmesan cheese: )
Karen Swank says
I have just made the pasta following your directions and they turned out wonderful. Thank you so very much for sharing your great recipe.
Karen Swank